

Kantankoho lets an organizer choose candidate dates and share a response URL. Participants can respond with available, tentative, or unavailable without creating an account.
1. Choose how you want to use the service
You can choose candidate dates manually and create a scheduling page without signing in.
Signing in with Google lets you view your Google Calendar while choosing dates. You can also set an expected response count and receive one email when that many responses have arrived.
| Option | Main features |
|---|---|
| Continue without signing in | Choose dates manually, create and share a response page, and manage it in the same browser |
| Sign in with Google | View Google Calendar, select available times automatically, receive a response-count email, and see schedules linked to your account |
2. Choose candidate dates
Use the calendar on the home page to select the dates and times you want to offer.
- On a computer, drag across the calendar to select a time range
- On a phone, choose a date and time from the mobile controls
- Review selected options and remove any that you do not want to share
When you are signed in, you can check your Google Calendar events while selecting options.
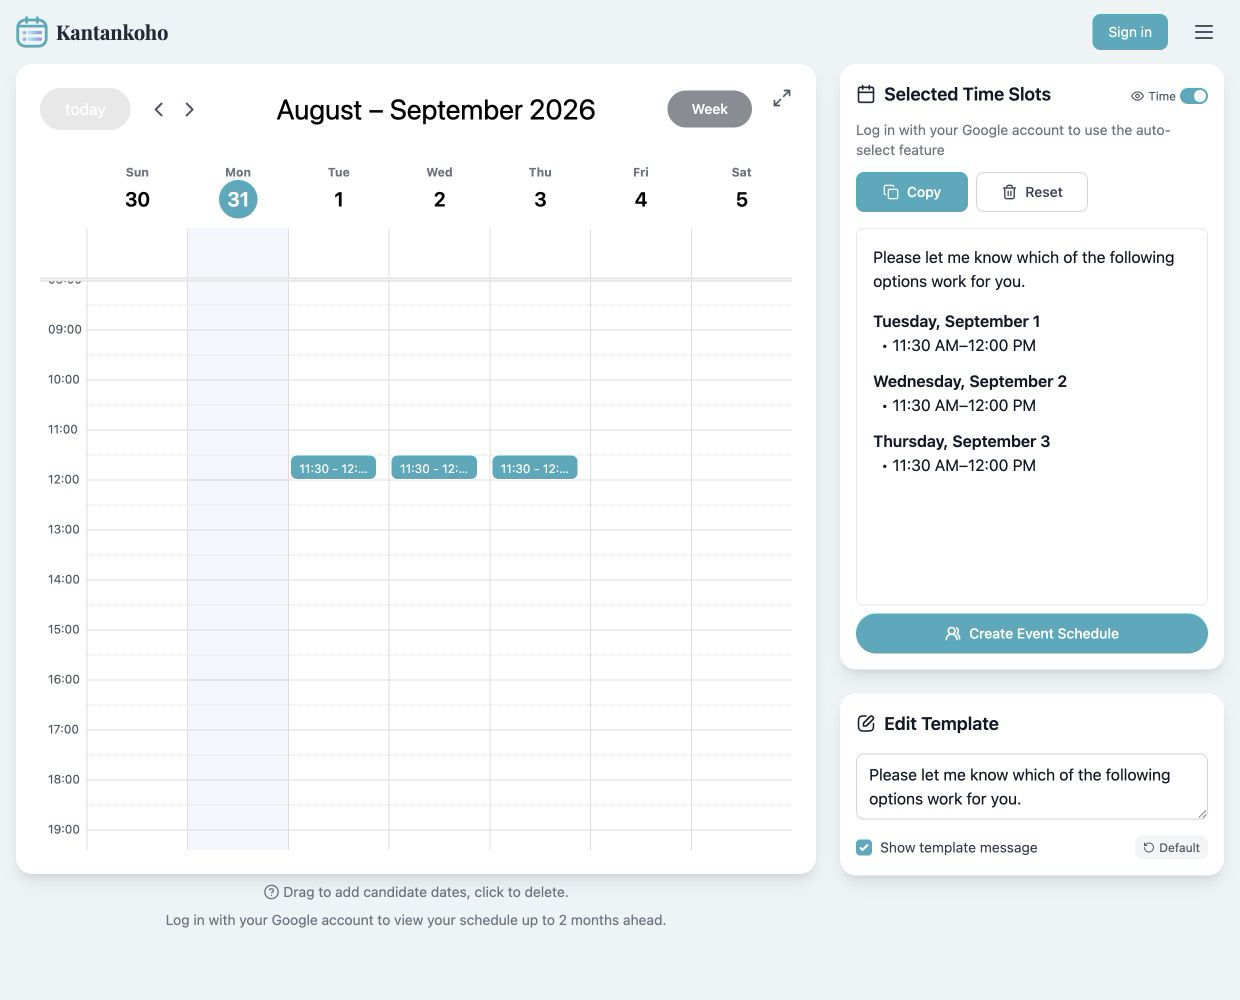 View full-size image (new tab)
Sample dates selected while signed out. Review the list on the right, then select “Create Event Schedule.”
3. Create a scheduling page
After choosing your options, select “Create Event Schedule.” Enter an event name and organizer name on the creation page.
You can also configure:
- An automatic organizer response
- Event details or notes
- A response deadline
- An expected response count when signed in with Google
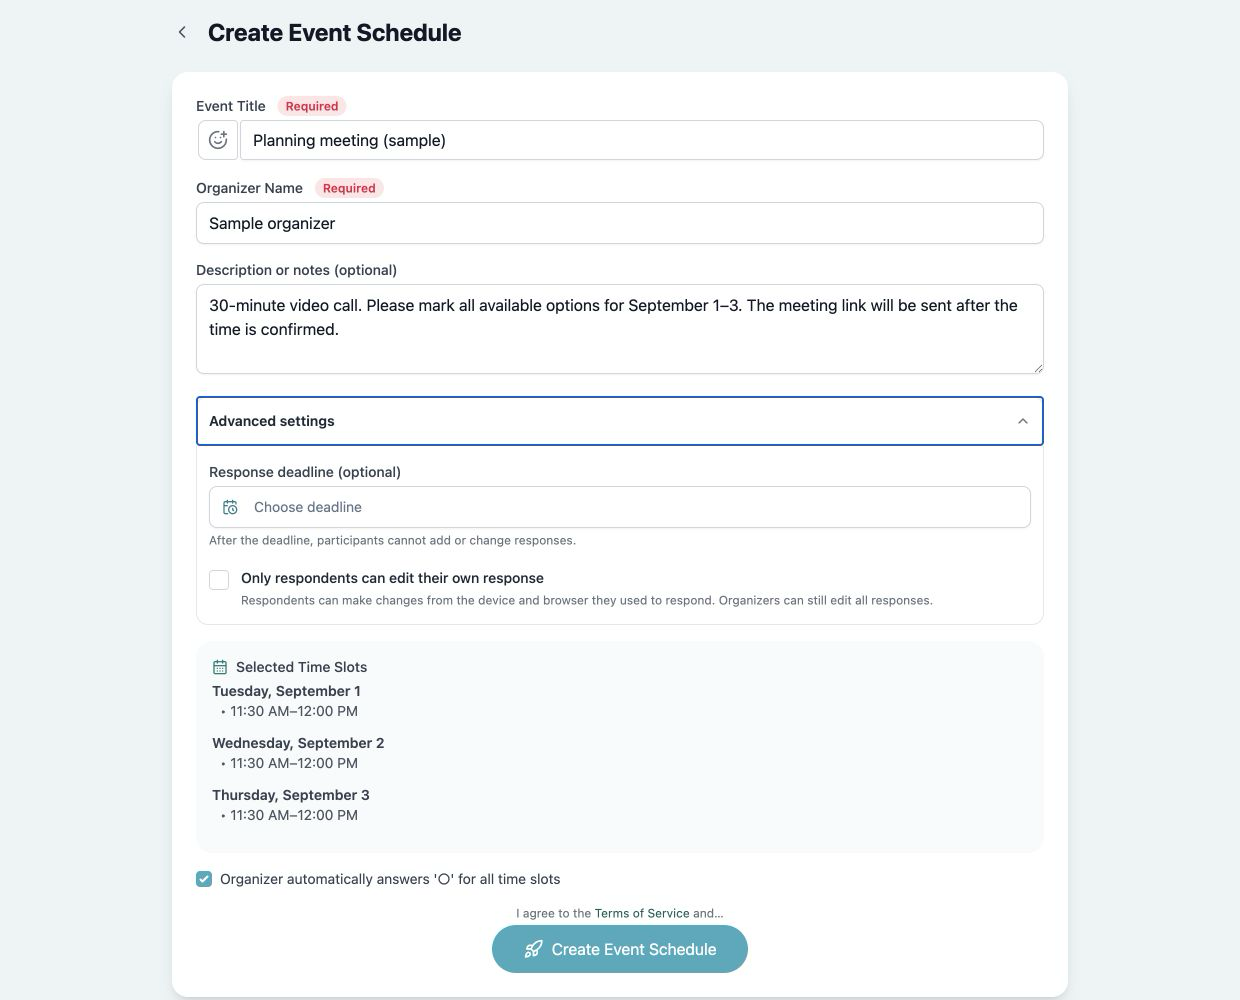 View full-size image (new tab)
Advanced settings include the response deadline and editing restrictions. After a configured deadline, participants cannot add or change responses. This image shows a sample before creation.
Review the settings and select “Create Event Schedule.”
4. Share the participant URL
Copy the participant link shown after creation and share it by email, LINE, Slack, or another messaging service. Include the purpose and response deadline instead of sending only the URL.
Please add your availability for our product planning meeting.
Respond by [date and time, time zone] using the link below.

Response URL: [Participant URL]
5. Participants respond
Participants open the shared URL, enter their name, and respond to each candidate time. They do not need to sign in or create an account.
- Available
- Tentative or available with conditions
- Unavailable
They can also add a comment when needed.
6. Review responses and choose a date
The response table shows each participant’s answer for every candidate time. Before confirming a date, check whether required attendees can join and whether any tentative conditions can be accommodated.
Send a separate meeting confirmation after agreement. The participant response URL is not a video meeting link.
Managing a schedule after creation
A schedule created without signing in can be managed from the same device and browser used to create it. Clearing browser data or switching devices may remove access to its organizer controls.
Schedules created while signed in are available from “Created schedules.”